WinTV v10 Application Download
This download is a complete WinTV v10 application, including Windows drivers for supported WinTV products plus utilities.
Installation notes for WinTV v10
A WinTV v10 Activation Code will be needed to install this WinTV v10 version. An Activation code for WinTV v8.5 or WinTV v8 cannot be used with WinTV v10.
If you do not have a WinTV v10 Activation Code, you can purchase a new WinTV v10 Activation Code on the Hauppauge webstore. If you have purchased an Activation Code for WinTV v10 with Extend from the Hauppauge Webstore, the latest version of WinTV v10 with Extend will also be installed.
Installation on multiple computers: the WinTV application can be installed on as many PCs as needed as long as the same Hauppauge device is plugged in when installing WinTV v10. We link the serial number of your TV tuner (sometimes it is the MAC address) with the WinTV v10 Activation code. So, as long as you use the same Hauppauge device, you can install on more than one computer.
Windows 11 Compatibility
WinTV v10 runs with Windows 11 and 10, but with some older Hauppauge products, you need to turn off the 'memory integrity' option on Windows 11. All current Hauppauge products including the WinTV-dualHD, WinTV-quadHD, WinTV-soloHD and USB-Live2 will operate with Windows 11 with memory integrity on.
For more information, see the Microsoft website.
WinTV v10
WinTV v10 installer
For Windows 11 and 10 (with limited support for Windows 8 and 7)
Version: 43323 |
File size: 161 MB | Date: Nov. 19, 2025
Release notes |
Backup download site |
Previous version 41041
Please note: due to changes in Microsoft's code signing policy for Windows 7 and 8, new drivers cannot be signed for the 64-bit version of Windows 7 and 8. The WinTV v10 application will work, but the drivers will not install without warning messages. Windows 10 and 11 will install normally.
New features:
New satellite channel table for Astra 19.2E and new satellite FM radio stations.
Record to network drive (NAS drive). The latest version of WinTV v10 will automatically move your recordings to a network drive after the recordings are complete, freeing up space on your local disk.
XMLTV TV guide data now supported.
Enable hardware acceleration when watching H.264 and HEVC broadcasts. Without hardware acceleration, on some PCs you might get audio but not video.
WinTV v10 installation instructions
The WinTV v10 will install Windows drivers before installing the WinTV v10 application.
- Step 1: Download the WinTV v10 installer by clicking the download button above. The WinTV v10 installer is normally saved in the Download folder on your PC
- Step 2: Run wintv10setup from the Download folder on your PC. If you get a Windows message 'Windows protected your PC', click 'More info' and then 'Run anyway'. This is one of Microsoft's new 'features' to block new applications.
- Step 3: Halfway through the installation, a message will pop up asking for you to enter the Activation Code.
- Step 4: At the Activation required screen, click on Enter Activation code and enter the activation code which was emailed to you or is printed on the WinTV v10 activation card. You do not need to enter the dashes, and you can use upper or lower case characters.
- Step 5: When the installation is complete, you will find the WinTV icon on your Windows desktop. Double click on this icon and the WinTV application will run. On the first run of WinTV, it will automatically go through the TV source selection and will scan for channels.
Note: If you encounter any problems during the installation of WinTV v10, you will need to disable your antivirus application. Once WinTV v10 is installed, you can reenable your antivirus application.
WinTV v10 Compatibility
Windows 11 Compatibility
WinTV v10 runs with the Windows 11 feature 'Memory Integrity' enabled with newer Hauppauge products including WinTV-soloHD, WinTV-dualHD, WinTV-quadHD, WinTV-HVR-935/955/975, USB-Live2 and ImpactVCB-e. Older Hauppauge products, such as WinTV-HVR-930C, WinTV-HVR-3000 and the WinTV-NOVA-T, will run under Windows 11 but will require turning off Windows 11 Memory Integrity.
For more information, see the Microsoft website.
WinTV-HVR hybrid analog/digital TV series
WinTV-HVR-935C, WinTV-HVR-930, WinTV-HVR-930C
WinTV-HVR-2200, WinTV-HVR-2205, WinTV-HVR-2255, WinTV-HVR-2250,
WinTV-HVR-5525, WinTV-HVR-4000, WinTV-HVR-3000
WinTV-HVR-1265 (both orignal and new models), WinTV-HVR-1260, WinTV-HVR-1250
WinTV-HVR-1600, WinTV-HVR-1800
WinTV-HVR-1150, WinTV-HVR-1100
WinTV-HVR-955Q, Xbox One TV tuner, WinTV-HVR-950Q, WinTV-HVR-950, WinTV-HVR-850
WinTV digital TV receivers
WinTV-dualHD, WinTV-quadHD, WinTV-soloHD
Starburst 2, Starburst
WinTV-NOVA-T, WinTV-NOVA-T-USB (DVB-T)
WinTV-Aero (DVB-T)
WinTV-NOVA-T stick (DVB-T)
WinTV-MiniStick (DVB-T)
WinTV Diversity Stick, WinTV-NOVA-TD Stick
ImpactVCB-e (both old and new models)
HD PVR series of high definition video recorders
HD PVR 2 (all models), Colossus 2, StreamEez-Pro, HD PVR model 1212, Colossus
Satellite TV receivers
WinTV-NOVA-S, WinTV-NOVA-S2, WinTV-NOVA
Starburst 2, Starburst
WinTV-HVR-5525
Digital cable receivers
WinTV-DCR-2650, WinTV-DCR-3250
TV tuners with limited support
WinTV PVR-250: up to Windows 7, 32-bit only
WinTV PVR-350: up to Windows 7, 32-bit only
WinTV PVR-USB2 (29xxx model): up to Windows 7, 32-bit only
WinTV PVR-150: up to Windows 7, 32/64-bit, less than 4GB RAM
WinTV PVR-500: up to Windows 7, 32/64-bit, less than 4GB RAM
WinTV PVR-PVR-USB2 (24xxx model): up to Windows 7, 32/64-bit, less than 4GB RAM
PCTV Products
- PCTV 340e/801e
- PCTV 73e
- PCTV HD TV Tuner Card (800i)
- PCTV 290e
- PCTV 77e
- PCTV 79e
- PCTV 78e
- PCTV 291e
- PCTV 292e
- PCTV 461e
- PCTV Pico Stick 74e
Note
If you do not see your Hauppauge product listed, please email us at: techsupport@hauppauge.com and we will check compatibility.
WinTV v10 Manuals
WinTV v10 Frequently Asked Questions
Do Hauppauge TV tuners work with Windows 11 'Memory Integrity' ?
Newer model WinTV tuners, including the WinTV-daulHD, WinTV-soloHD, WinTV-quadHD and all WinTV-HVR models, work with Windows Memory Integrity turned on.
Some older Hauppauge TV tuners, such as the WinTV-HVR-1800, will not work with Windows 11 Memory Integrity.
How do I rescan channels?
Click on the setting button (Gear) in the lower left of the WinTV v10 application. Then click on the Devices tab and highlight your WinTV device and click Tuner Setup (see the first picture below).
In the Device Setup Wizard, you will see a list of TV formats which your Hauppauge TV tuner can support. Depending upon which Hauppauge tuner you have, you will have a choice of analog, digital or external inputs (see the second picture below). You can also select all formats and let the WinTV application show you what it finds in each format (if anything).
Click Next and Next and let WinTV scan for channels. The results should look like picture 3 below.
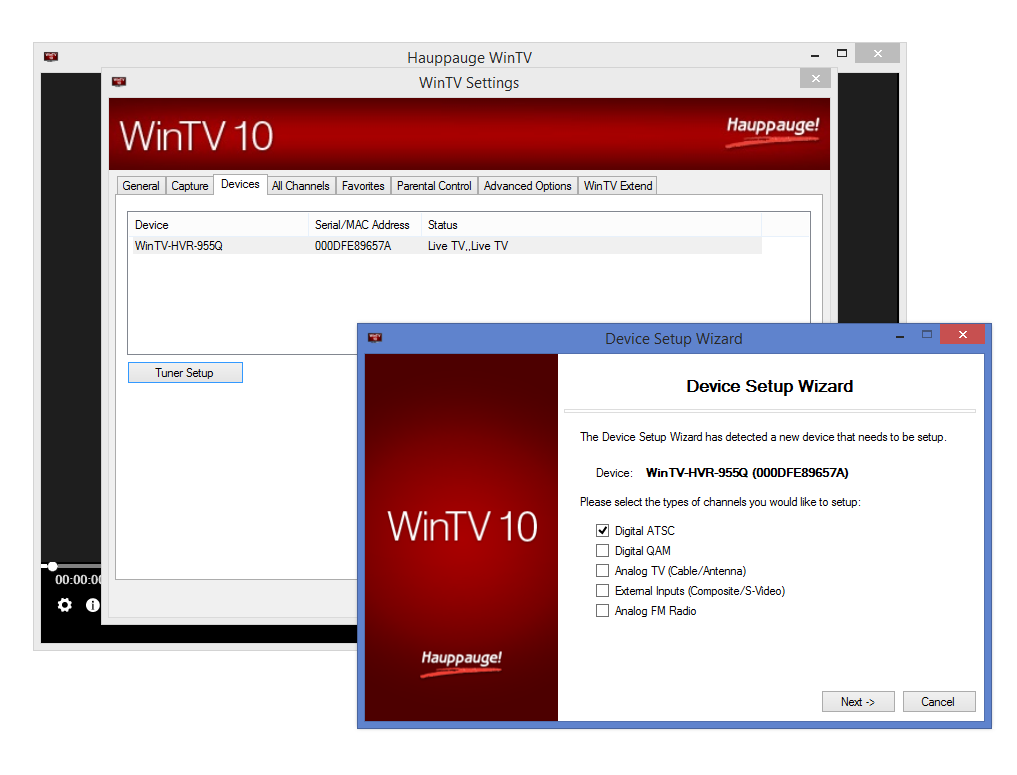
Settings -> Devices -> Tuner Setup
click to enlarge
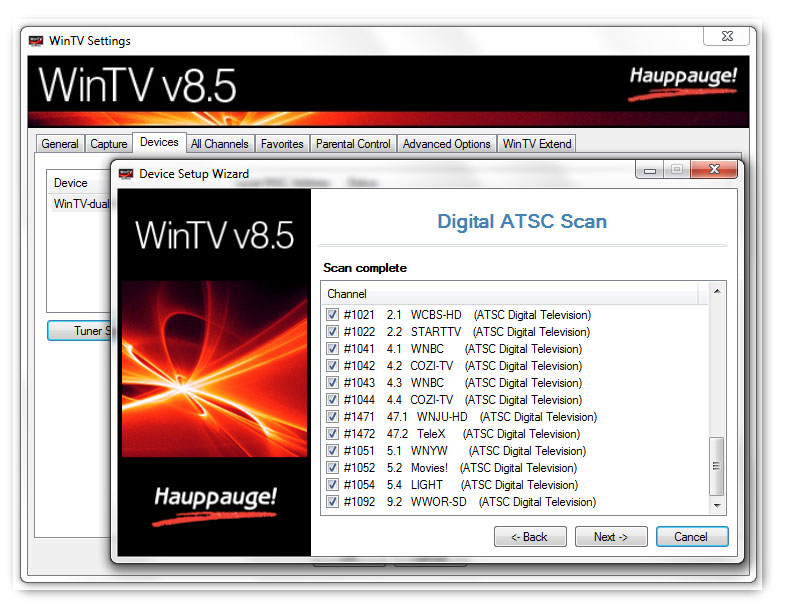
Scan Complete
click to enlarge
In WinTV, I am getting sound but no video. What can I do to get video?
On some Windows 10 and 11 PCs, to get video you need to turn on Hardware Acceleration. To do this:
- In WinTV v10, click the 'gear' icon on the lower left
- Go to the 'General' tab
- On the bottom left, under 'Hardware acceleration', you can click 'MPEG-2', 'H264' or 'HEVC'. This will allow your PC to use hardware acceleration when displaying TV tuner video
Can I get 5.1 channel audio with WinTV v10?
Yes. When receiving digital TV with a surround sound (5.1) audio track, WinTV v10 can send the 'raw' digital audio track to your PC's sound card. The sound card will then either decode the 5.1 channel audio and drive your surround sound speakers or send the undecoded audio stream via SPDIF or HDMI to a sound bar or 5.1 channel capable HDMI monitor.
But to hear 5.1 channel audio, you need two things:
- your PCs sound card needs to be able to handle the 5.1 channel audio and
- you need to 'tell' WinTV v10 not to decode the 5.1 channel audio stream.
A couple of tips for hearing 5.1 channel audio from a WinTV tuner:
- make sure you have a sound card which supports 5.1 channel audio. If your sound card does not support 5.1 channel audio, you will not hear any sound at all with the Output 5.1 via SPDIF option checked.
- In the WinTV v10 application, go to Settings (click the 'gear' icon on the lower left) and in the General tab, check the Output 5.1 via SPDIF option. This option sends an undecoded audio stream to your sound card.. If your sound card has 5.1 channel audio capability, it will decode the audio stream and you will hear audio through the speakers, monitor or sound bar attached to your sound card or graphics card.
- If you have the Output 5.1 via SPDIF option checked and you hear no sound, make sure you have set your PC and sound card to output audio via the SPDIF ouput on the sound card or HDMI via your graphics card (and of course you need to have an HDMI monitor with 5.1 channel audio).
- if you hear no audio with the Output 5.1 via SPDIF option checked, check to make sure you have a 5.1 channel capable sound card, a 5.1 channel capable monitor or sound bar. And make sure your PC is configured to output audio from the sound card (via SPDIF) or the graphics card (via HDMI).
- If your PC and sound card are configured to send audio to the 3.5mm stereo audio jack which is normally connected to speakers, you will not hear any audio. To fix this, under 'Control Panel' -> 'Sounds' set the default output to SPDIF or HDMI.
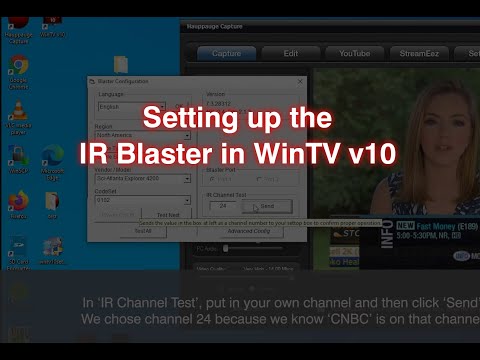
Which HD video recorder can be used to schedule WinTV recordings from my cable box?
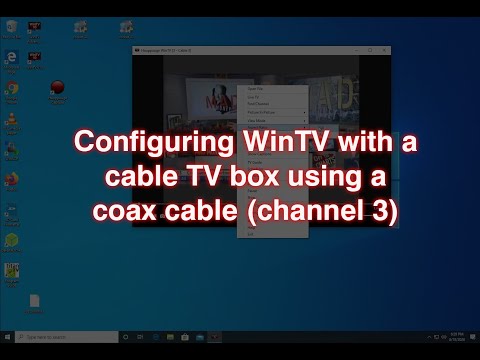
I have a WinTV-HVR which has analog capability. How can I manually add channel 3 so I can get video from my cable or satellite box?
Here's how to manually add channel 3:
- click the 'gear' icon on the lower left of WinTV v10
- go to the 'Devices' tab
- select your device (example:WinTV-HVR-955Q)
- click 'Tuner setup'
- select 'Analog TV (cable/antenna)'
- under 'Channels' use the pull down menu and select 'Manual Entry'. Then click 'Next'
- in 'Number', type 3
- in 'Name' type 3 (or maybe something like 'Cable box'
- click 'Add'
- click 'Next' and 'Next'
Now you will have added analog channel 3 to your channel list. You can find the channel list by RIGHT clicking your mouse over the WinTV window and selecting 'Find channel'. You should see channel 3 listed.
How do I setup NAS recording in WinTV v10?
Record your TV programs to a network drive (NAS drive)
You can now automatically copy all WinTV v10 recordings to a network drive (NAS drive).
To setup NAS recording in WinTV v10, go to 'Settings -> Recordings -> Network Recordings'. After entering your 'Network Directory', 'Network Username' and 'Network password', click the 'Test Save' button. WinTV v10 will try to write a small file to your network folder and then to read it back. If it can read it back successfully, you will see a message 'Network Connection Successful' and your Network credentials will be saved in WinTV v10 and used for all recordings.
The WinTV v10 recording is initially saved onto a local disk drive. After the recording is complete, it is copied over to the network (NAS) drive. When the copy is finished, you can optionally have the original recording deleted from your local disk drive.
Network recordings are shown in the Recording List so you can play the recordings back in WinTV v10 from the NAS drive.In the latest version of WinTV v10, we have added a 5 second wait and retry when copying scheduled recordings to the NAS drive. Only copying to network if TS2PS is OFF for this release. Speed up network access when there is already a drive mapping.
WinTV v10 now tries to copy first without credentials then with credentials, to avoid a 17 second timeout when there is an existing connection to the Network drive.
WinTV v10 now trims trailing \ at and of network share name if user typed it with extra \ at end.
Browse network location' button checks if the connection can be made before opening at that location. If it can't, it opens the default 'My Computer' window and blanks the box.
Re-uses an existing network connection if a connection is already made when accessing network files.
My PC is not waking up for recordings. How can I fix this?
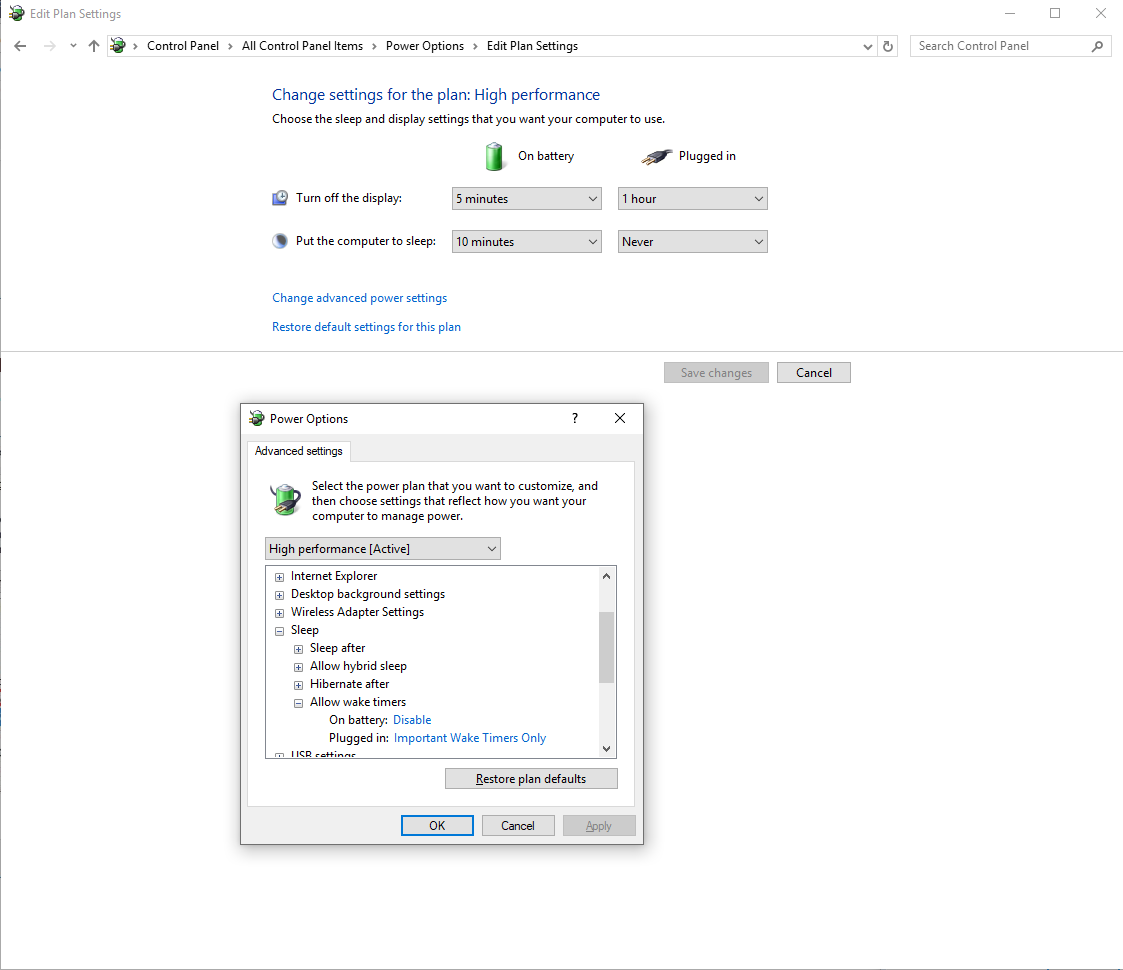
Windows 10 Wake settings
Power Options -> Change Advanced Power Settings -> Sleep -> Allow wake timers:
Control Panel\All Control Panel Items\Power Options\Edit Plan Settings
On my PC it was set to "Important Wake Timers only" and the PC wouldn't wake up for recordings.
I have two Hauppauge tuners in my PC. How does WinTV handle the channels from the second tuner?
In WinTV, you perform a TV channel scan on each tuner. WinTV then makes a list of channels which can be received for each tuner.
The tuners do not need to be the same. For example, one tuner can be connected to an antenna and the other tuner can be connected to a cable TV wire.
Both sets of channels will appear in the WinTV channel list. When you choose a channel, WinTV knows which tuner is associated with that channel and will use the corresponding tuner.
This works for both live channel watching and also scheduled recording.
How do I tune to digital channels with the Hauppauge remote control? There is no dot on the remote.
To tune to a digital TV channel (example: 55.1), enter a '1' before the digital channel and do not enter the period/dot. Example: to tune to digital channel 55.1, enter 1551 with the remote control. Hit 'Ok' to tune to that channel. This also works from a keyboard: enter 1551 and then hit 'Enter'.
WinTV 10 Gallery
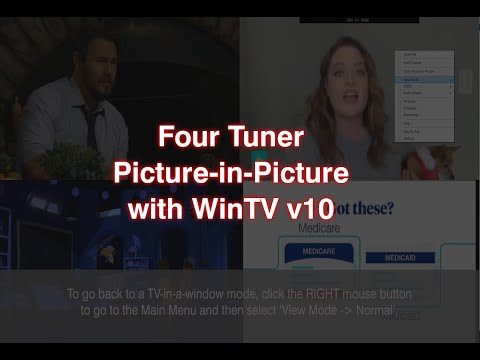
 Four tuner picture-in-picture
  WinTV v10 Now/Next
 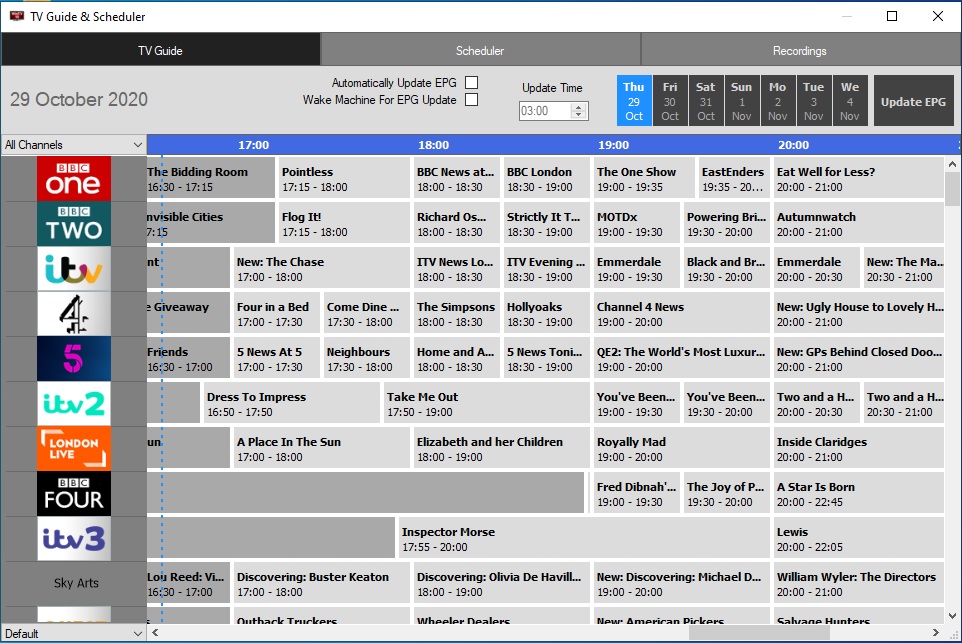 WinTV v10 Electronic Program Guide (EPG)
 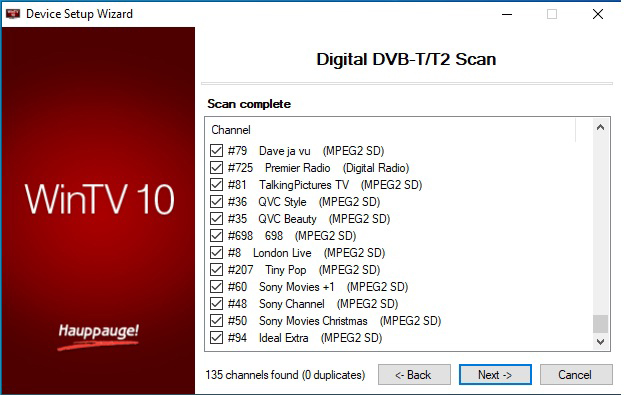 Freeview channel scan
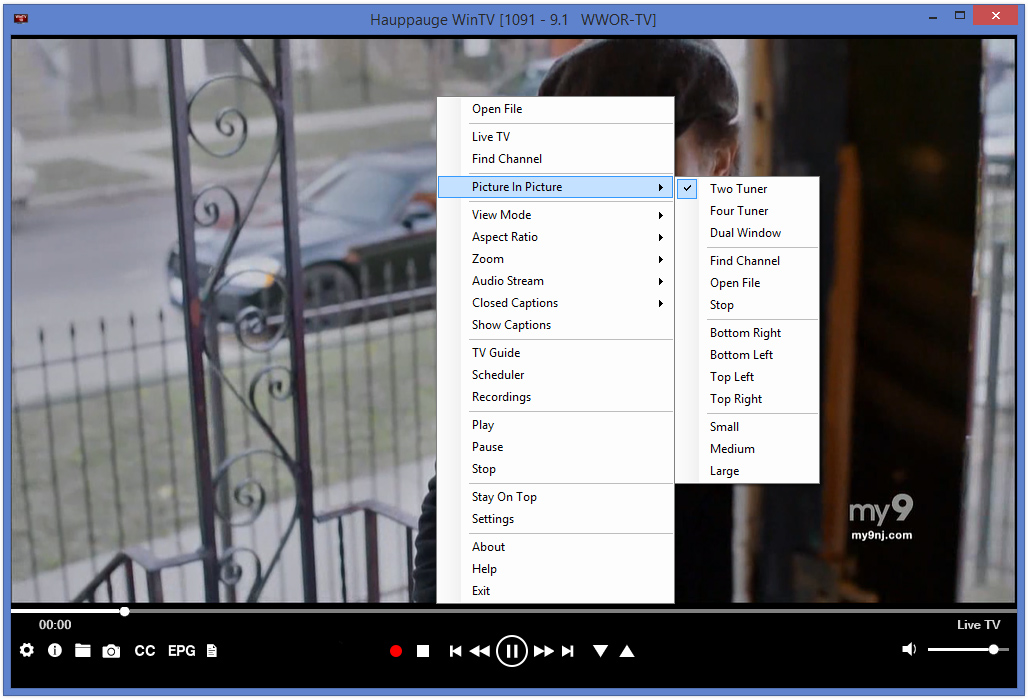 WinTV v10 main menu (context menu)
 WinTV v10 Videos


WinTV v10 Keyboard Shortcuts
Keyboard Control in WinTV
Note: to tune to a digital TV channel (example: 55.1), enter a '1' before the digital channel and do not enter the period/dot. Example: to tune to digital channel 55.1, enter 1551 with the keyboard or Hauppauge remote control. Then hit either 'Enter' or 'OK' to tune to the channel.
- Next Channel: Plus (+)
- Previous Channel: Minus (-)
- Last channel (the channel you were tuned to previously): Alt P
- Increase Audio Volume: 'Page Up'
- Decrease Audio Volume: 'Page Down'
- Mute: 'Ctrl + M'
- Enter Preset Number: '0 - 9'
- Show Channel List: 'Ctrl + L'
- Make Snapshot: 'Space Bar'
- Show Now/Next: 'Ctrl + O'
- Display Stream Details: 'Ctrl + D'
- Subtitles on / off: 'Ctrl + S'
- Change Aspect Ratio: 'Ctrl + A'
- Pause Live TV: 'Ctrl + Q'
- Continue Live TV: 'Ctrl + P'
- Record: 'Alt + R'
- Stop recording: 'Alt + S'
- Skip Ahead: 'Ctrl + F'
- Skip Back: 'Ctrl + R'
- Catch up to live TV: 'Ctrl + C'
- Full Screen / TV-in-a-window: 'Ctrl + W'
- Exit Full Screen: 'Esc'
- Start TV: 'Alt + T'
- Start Recording: 'Alt + R'
- Stop Recording / Playback: 'Alt + S'
- Open File menu for playback: 'Alt + F'
- Open the Task Menu: 'Alt M'
- Open WinTV Settings Dialog: 'Ctrl + I'
- Exit Application: 'Alt + F4'